Integrating Web3Forms in React
Manish Tamang / June 08, 2024
4 min read • NaN views
Integrating Web3Forms in a React Project
This blog will guide you through the steps to integrate Web3Forms into your React project using react-hook-form and react-hot-toast.
Prerequisites
Make sure you have a React project set up. If not, you can create one using Create React App:
npx create-react-app my-appcd my-app
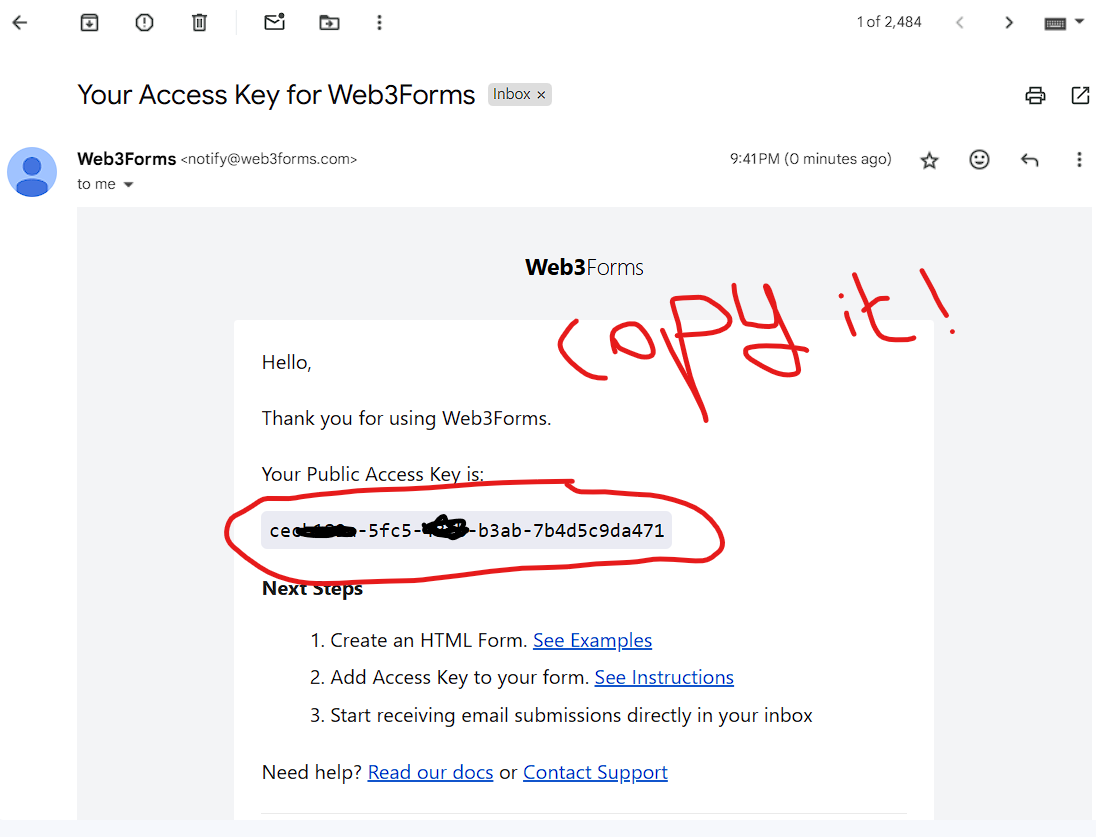
Obtain Web3Forms API Key
- Go to Web3Forms.
- Click on the "Create your Access Key" button.

- Enter your email address in which you want an email for contact form and click "Create Access Key".
- Copy the access key from the email sent to you by Web3Forms.
Install Dependencies
npm install @web3forms/react react-hook-form react-hot-toast
I'm using react-hot-toast for toast messages so you can remove it if you don't want to use it.
Create the Contact Form Component
Create a new file named Contact.js in your components folder and paste the following code:
import React, { useState } from 'react';import toast, { Toaster } from 'react-hot-toast';import { useForm } from 'react-hook-form';import useWeb3Forms from '@web3forms/react';export default function Contact() { const { register, reset, handleSubmit } = useForm(); const [isSuccess, setIsSuccess] = useState(false); const [result, setResult] = useState(null); const accessKey = 'XXXX-XXXXXX-XXX-XXXX'; // Replace with your actual access key const { submit: onSubmit } = useWeb3Forms({ access_key: accessKey, settings: { from_name: 'Portfolio', subject: 'New Contact Message from manishtamang.xyz Portfolio' }, onSuccess: (msg, data) => { setIsSuccess(true); setResult(msg); reset(); toast.success('Message sent successfully.'); }, onError: (msg, data) => { setIsSuccess(false); setResult(msg); toast.error('Message sent failed!'); } }); return ( <> <div className="flex flex-col items-start justify-center max-w-[45rem] mx-auto mb-16"> <h1 className="mb-4 text-3xl font-bold tracking-tight text-black md:text-5xl dark:text-white"> Contact Me </h1> <p className="mb-4 text-gray-600 dark:text-gray-400"> Thank you for visiting our website. We are always happy to hear from you and answer any questions you may have. Please fill out the form below with your name. </p> <div className="w-full mx-auto"> <div className="mt-4 grid items-center lg:grid-cols-2 gap-4 lg:gap-6"> <div className="flex flex-col border border-blue-100 shadow-3xl rounded-xl p-6 lg:p-8 bg-white dark:border-gray-800 dark:bg-black-charcoal"> <Toaster position="top-center" reverseOrder={false} toastOptions={{ duration: 5000 }} /> <form onSubmit={handleSubmit(onSubmit)}> <div className="grid gap-4"> <div className="grid grid-cols-1 sm:grid-cols-0 gap-4"> <div> <label htmlFor="fname" className="sr-only"> Full Name </label> <input type="text" {...register('name', { required: true })} className="py-3 px-4 block w-full border-gray-200 rounded-md text-sm text-gray-900 focus:border-blue-500 focus:ring-blue-500 bg-slate-100 dark:bg-black-ebony dark:border-gray-700 dark:text-gray-400" placeholder="Full Name*" /> </div> </div> <div> <label htmlFor="email" className="sr-only"> Email </label> <input type="email" {...register('email', { required: true })} autoComplete="email" className="py-3 px-4 block w-full border-gray-200 rounded-md text-sm text-gray-900 focus:border-blue-500 focus:ring-blue-500 bg-slate-100 dark:bg-black-ebony dark:border-gray-700 dark:text-gray-400" placeholder="Email*" /> </div> <div> <label htmlFor="phone" className="sr-only"> Phone Number </label> <input type="tel" {...register('phone', { required: true })} className="py-3 px-4 block w-full border-gray-200 rounded-md text-sm text-gray-900 focus:border-blue-500 focus:ring-blue-500 bg-slate-100 dark:bg-black-ebony dark:border-gray-700 dark:text-gray-400" placeholder="Phone Number*" required /> </div> <div> <label htmlFor="message" className="sr-only"> Messages </label> <textarea {...register('message', { required: true })} rows={4} className="py-3 px-4 block w-full border-gray-200 rounded-md text-sm text-gray-900 focus:border-blue-500 focus:ring-blue-500 bg-slate-100 dark:bg-black-ebony dark:border-gray-700 dark:text-gray-400" placeholder="Messages*" required ></textarea> </div> </div> <div className="mt-4 grid"> <button type="submit" className="inline-flex justify-center gap-1 items-center px-4 py-3 bg-blue-600 disabled:opacity-50 disabled:hover:bg-blue-600 hover:bg-blue-700 text-white text-sm font-medium rounded-md" > Send </button> </div> <div className="mt-3 text-center"> <p className="text-sm text-gray-500"> I'll get back to you in 1-2 business days. </p> </div> </form> </div> </div> </div> </div> </> );}
You can directly paste it into your contact components and replace your access key in line number 21.
Here's Quick Explanation of the code:
- Import Statements: Import necessary packages including
react,react-hot-toast,react-hook-form, and@web3forms/react. - State Management: Use React's
useStateto manage form state, success state, and result state. - Form Registration: Use
react-hook-formto register form inputs and handle form submission. - Web3Forms Integration: Configure
useWeb3Formswith an access key, form settings, and success/error handlers. - Form Structure: Create a form with input fields for name, email, phone, and message. Each input field uses the
registermethod fromreact-hook-form. - Submit Button: Add a submit button that triggers form submission.
Using the Contact Component
Finally, import and use the Contact component in your main application or any other component:
import React from 'react';import Contact from './components/Contact';function App() { return ( <div className="App"> <Contact /> </div> );}export default App;
With these steps, you have successfully integrated Web3Forms into your React project. You can now use this form to collect contact information and handle submissions with Web3Forms.
If you love the blog then make sure you've followed me in instagram.
Thank You. Happy Coding ❤️